
Although Epic does a great job explaining material construction, they don't clearly explain the different ways to apply multiple textures to a mesh. This has been a source of confusion for me since moving from UDK3 to UE4.
After spending a month watching UE4 material tutorials, building sample scenes and using Substance Designer, I think I have a handle on the 4 approaches. I will be fleshing out this blog entry with details on how to do each approach. I will provide examples, show the results in UE4 and discuss the pros & cons of each approach.
I use blender for 3D modeling. These same tactics apply to other tools like 3D Studio Max.
----------------------------------------------------------------------------------------------------------------
Approach 1: Mapping multiple textures within the mesh
----------------------------------------------------------------------------------------------------------------
In this approach you map the different textures directly within your mesh. This is the old/traditional approach to multi-texturing objects.
Approach 1a: Overlapping UVs (this does not work anymore!)


In this example I have 3 images: red clay, black metal and concrete. I UV map using cube projection onto each image. I then scale the mapping until I like it.
Here is my lightmap uv channel:
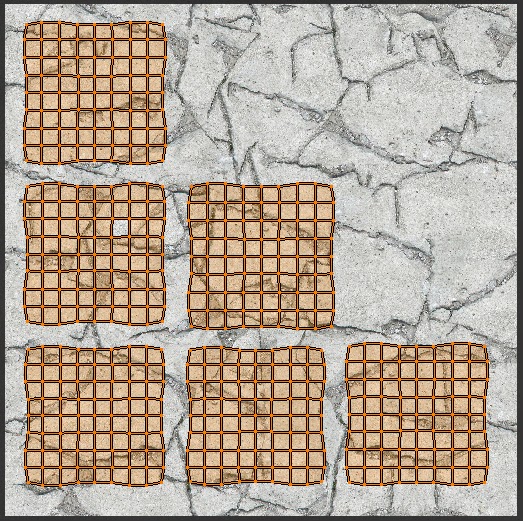
Even with a lightmap uv channel and lightmap resolution set to 1024 it renders poorly in UE4:


Approach 1b: Wrapping, but Non Overlapping UVs (this does not work anymore!)
This is similar to the first approach except you ensure non of your UV overlap. In the prior example notice that some of the squares in the UV map are bright orange... that means that more than one face are on top of each other in the UV map. To fix this I need to select faces on each surface of the cube and separate them from the other faces.
Um, wow, this doesn't work either... so... wrapping UVs are not an option any more with UE4. This pretty much means all my meshes from UDK3 are boned.
UV mapping in blender:

Lighting render in UE4

Approach 1c: no wrapping or overlapping
For these UV maps I selected each face and uv projected from a straight on view. I then shrunk and positioned the UV mapping so there was no overlap and it fit within the confines of the UV coordinates.
Here is the UV mapping:

Here is the render:

I must admit this was a bit of a shock to me. This explains why I never see UV mapping examples that wrap. You can't do it anymore.
Advantages:
1. Faster design time
2. You don't need to do much with your material for your mesh to have multiple textures
3. Each texture is reusable, tiles and is separate
4. You can have normals for each texture with no issues
5. It renders quickly
Disadvantages:
1. You can not easily apply other effects in a UE4 material
2. The mesh is controlling the mapping. It may take more vertexes to get the mapping you want
3. The textures do not blend into each other and thus do not look organic
4. Because you can not wrap, you must use a TextureCoordinate in the materials to scale your textures.
Here is an example of 1 of the 3 materials. They all look the same (except metallic/roughness values vary). The texture coordinate is used to tile the texture by 3 vertically and horizontally:

If you can get away with this approach it is very fast. This is the approach I used for all meshes in "The Stacks". Unfortunately, this approach is limited by what UE4 allows.
NOTE:
This has gotten harder. I'm not sure if it is UE4 or blender fbx export... but now you have to create materials in blender for each material that shows up in UE4. You used to be able to UV map onto multiple images and each image would automatically become a material. Not anymore.
This sucks. A lot.
In blender, for each UV mapped image you now need to set up a material:
1. add your material
2. with the material selected, go to the texture tab
3. indicate it is an image, pick the image and set coordinates to UV

4. you need to assign the material to the faces you UV mapped

That is very very painful. I guess I was lazy before and never knew it.
----------------------------------------------------------------------------------------------------------------
Approach 2: Layering multiple textures within a material
----------------------------------------------------------------------------------------------------------------
In this approach, you create a mask with color regions representing different textures. Here is a video that talks about it but does not explain wtf is going on. That video was very frustrating to me.
The first thing you need to do is create a UV color mask. The only way I know to do it is with Substance Designer. You import your mesh and then bake "UV to SVG".
Here is the baking process in Substance Designer:

Here is the resulting SVG:

Notice how this matches our UV mapping in blender?
What is this black magic?
Well... now we have a mask where each color represents a different texture. We can use UE4 material blending functions to blend the textures in one material. Even though I have created a mask based on the materials in the mesh, I am no longer constrained by the vertexes of the mesh to map multiple textures onto the mesh.
Note that I could also use this mask to do the same thing in Substance Designer, but I want to focus on the UE4 material approach. It is the only way to reuse textures and keep memory usage down.
To covert this bugger into a bitmap I needed to download something that understood SVG (scalable vector graphics). I picked Inkscape.
Next thing we need to do is reduce the mesh to 1 material where all faces UV map onto the same image:

At this point we have lost the 3 different texture mappings. That is what we want!
Now to import the UV mask, create a simple material and apply it to this 1 material mesh:

See how we have the 3 different texture regions/colors yet the mesh is mapped to 1 UV. The idea is to replace those color masked areas with the texture we want using UE4 material functions.
Now for the fun stuff.
First we need to create Material Functions for each of our materials. In this case I am creating a material function for red plaster, concrete and black metal. These look identical to the Materials I used earlier except they are functions:

Now we combine these material functions using a material. I am using one of the layer material functions called MatLayerBlend_Standard. It takes in 2 material functions and a mask. The material functions become 2 layers (bottom and top). The top shows up over the bottom based on the mask.

My layers are this (top to bottom)
black metal (masked via blue)
plaster clay (masked via red)
concrete
Notice that we didn't need the green masking color for concrete. It is the lowest level material.
To connect the output of this node chain to the end you need to check "use material attribues" in the "material details tab"
Here is the result (cube on the right).

Pretty cool eh? They look identical even though the textures are combined in different ways.
Lets have a little fun. Remember how I said the mask allows us to do things that aren't tied to the mesh vertexes? Lets add logos to each side of the cube.
Logo mask:
Swap out old mask with logo mask:
The result:
Advantages:
1. You can have normals for each texture with no issues
2. You can reuse textures through layer masking
3. The textures on the mesh are not driven by vertexes
4. You can easily add more effects to the material (rain, dirt, etc.)
Disadvantages:
1. It takes more work to set up the texture. Materials must be converted into Material Functions.
2. It renders slower. Each material function is rendered for each pixel, regardless of whether it is shown. In my example, 3 materials are being fully rendered (plaster, metal, concrete)
This is a powerful feature. I plan to use it a lot.
This page has a complete list of material blending functions:
https://docs.unrealengine.com/latest/INT/Engine/Rendering/Materials/LayeredMaterials/index.html
----------------------------------------------------------------------------------------------------------------
Approach 3: Combining multiple textures into 1 texture that is then used in a material
----------------------------------------------------------------------------------------------------------------
The is the Substance Designer approach.
Here is a concrete material in substance designer. Nothing fancy here:

Here is the master material that blends the metal, concrete & plaster materials together. This is similar to what I did in UE4. It is more intuitive/easier in substance designer:

Here is what the material looks like applied to the mesh in substance designer:

Now comes the rub. Even if you use the substance plugin in ue4 your end result is 4 separate bitmaps (I've combined them in this preview, but imagine 4 2048x2048 textures in UE4:

I've imported these 4 images into ue4 and built a material:

Here is the result in ue4:

Advantages:
1. Substance designer is easier to use than UE4's material editor.
2. Substance can create UV->SVG bakes
3. You can apply lots of effects to your material
4. It renders quickly in ue4
Disadvantages:
1. You can not reuse your textures. Each material you build in substance designer will become 4 additional textures. This can be a LOT of memory consumption
I enjoy using substance designer. It can create really cool materials. BUT you need to keep in mind the lack of texture reuse. If you plan on wanting many variants of a material or want texture reuse, the substance route is not the way to go.
----------------------------------------------------------------------------------------------------------------
Approach 4: Vertex painting
----------------------------------------------------------------------------------------------------------------
I learned this approach replicating a scene built by the amazing Ben Burkart.
There is a cool feature of UE4 that allows you to paint colors (including the alpha channel) onto vertexes in your mesh. You can then use that color information to lerp 2 textures together. You can chain the lerps to mix 3 or even 4 textures together.
Here is the black magic material for a 3 vertex color material:

https://docs.unrealengine.com/latest/INT/Engine/UI/LevelEditor/Modes/MeshPaintMode/VertexColor/MaterialSetup/3Way/index.html
Note that this material is incomplete. You need to do the same set of lerps for normals, metallic and roughness.
Here is the cube with the material applied and red, green & blue colors painted onto different vertexes. I have rolled the brush over the mesh so you can see the vertex colors (the dots on the mesh):

Advantages:
1. Level designers can adjust the look of a material per mesh
2. Material memory consumption is saved since you aren't creating a ton of different bitmaps to customize meshes
Disadvantages:
1. Building the material take a bit of work.
2. It will have the same rendering issue blended materials have.
3. Your mesh needs to have enough vertexes so the textures blend organically. This cube mesh does not have enough vertexes.
This is a powerful feature that give a lot of flexibility to a level designer. You can use it to paint grass/dirt onto steps and walls. You can also create landscape meshes without using the landscape editor. I used this extensively when replicating a scene by evilmrfrank. It allowed me to add water in a trench just by painting a specific vertex color onto it.
Summary:
Each of these techniques have their role in game design. I hope I've shed some light onto how to do multi-texture materials/meshes.
Appendix
https://docs.unrealengine.com/latest/INT/Engine/Rendering/Materials/index.html
http://www.polycount.com/forum/showthread.php?p=2053002
https://docs.unrealengine.com/latest/INT/Engine/UI/LevelEditor/Modes/MeshPaintMode/VertexColor/MaterialSetup/3Way/index.html
No comments:
Post a Comment